If you're having trouble with your Ethernet connection even though WiFi works, try updating your Ethernet drivers and check if your cable is plugged in correctly. This should do the trick in most cases.
I recently found myself in a similar situation when I moved into a new apartment and tried to set up my internet connection. Turns out I had damaged my Ethernet cable while moving around boxes.
However, faulty cables are not the only reason for the 'WiFi works but not Ethernet' issue that tends to pop up from time to time. Over the years, I've discovered various solutions to resolve this problem and I'll discuss them in this article.
How to Fix the "WiFi Works But Not Ethernet Connection" Issue?
You can start by checking the connection between your computer, modem, and WiFi router. If the WiFi connection is working well from the same router, but the Ethernet is not, there could be various reasons for it.
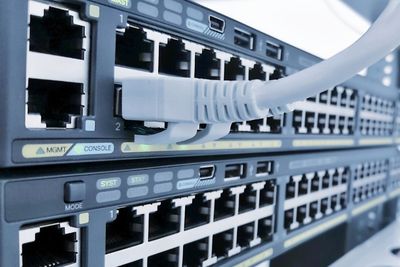
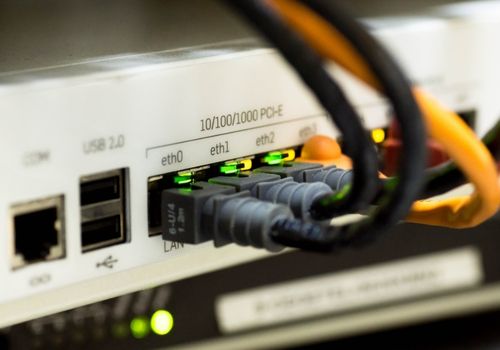
1. Check the Ethernet Cable
One of the most common reasons for the internet connection issue is a faulty Ethernet cable. To check if the Ethernet cable is the issue, make sure that:
- The network cable is properly plugged in. If it isn't, plug it in correctly.
- The Ethernet cable isn't damaged. If it is, replace the Ethernet cable with a new one.
2. Update Ethernet Drivers
Outdated or corrupted Ethernet drivers can cause problems with your connection. To update the network drivers, follow these steps:
- Visit the website of the network adapter's manufacturer and locate the support section.
- Find the latest version of the network driver that is compatible with your operating system.
- Get the driver and install it on your computer by following the instructions displayed on the screen.
- Once the installation is finished, reboot your computer to implement the changes.
How To Find Which Ethernet Network Adapter You Have?
If you're not sure which network adapter is installed on your computer, you can follow these steps to confirm and check:
On Windows:
- Navigate to the Start menu and search for "Device Manager."
- Launch Device Manager and expand the "Network adapters" category.
- You will see a list of all the network adapters installed on your computer.
- Find the one that corresponds to your Ethernet connection and note down the manufacturer and model.
On Mac:
- Open "System Preferences" from the Apple menu.
- Choose "Network" under "Internet and Wireless."
- Select the Ethernet interface on the left.
- Click "Advanced," then go to the "Hardware" tab to find the MAC address.
3. Check the Advanced Network Settings
Another reason for the network connection issue could be a disabled Ethernet connection in the network and internet settings. To enable this, follow these steps:
On Windows:
- Click on the Windows Start button, type "Network and Sharing Center," and select it from the search results.
- In the Network and Sharing Center window, click on "Change Adapter Settings" located on the left side of the window.
- In the "Change Adapter Settings" window, check if the Ethernet connection is disabled. If it is disabled, you will see a red X over the Ethernet icon.
- Right-click on the Ethernet connection icon and select "Enable" from the context menu.
On Mac:
- Go to the Apple menu and select “System Settings” on your Mac.
- Click on “Network” in the sidebar (scroll down if needed).
- Choose the “Ethernet service” on the right, and click on “Advanced”.
- Toggle Limit IP Address Tracking on or off if desired.
- Select TCP/IP in the sidebar.
- Choose your ISP's recommended configuration method from the Configure IPv4 pop-up menu.
- If using DHCP, select it and let your ISP assign you an IP address.
- If using DHCP with a manual address, select it and enter the specific IP address provided by your ISP.
- If using Manual configuration, select it and enter the IP address, subnet mask, and router address given by your ISP.
- Enter the DNS server or search domain settings under the DNS tab if needed.
- Enter WINS settings if needed under the WINS tab.
- Enter proxy server settings if needed under the Proxy tab.
- Configure Ethernet hardware settings under the Hardware tab if needed.
- Click OK.
4. Disable WiFi
Another reason for this issue could be that your computer is prioritizing WiFi over Ethernet, which can cause conflicts. To fix this, disable the WiFi connection and follow these steps:
On Windows:
- Click on the Windows Start button, type "Network and Sharing Center," and select it from the search results.
- In the Network and Sharing Center window, click on "Change Network Adapters Settings" located on the left side of the window.
- Right-click on the WiFi connection icon and select "Disable" from the context menu.
- If the Ethernet connection is already enabled, unplug the Ethernet cable and plug it back in. This will force your computer to detect the connection.
On Mac:
- Open Network settings.
- Check the status of your network connection services: Green (connected), yellow (not connected), and red (not set up).
- Compare your settings with those recommended by your ISP.
- Update your settings as needed.
- For PPPoE, ensure the Service Name field is empty.
- If your ISP requires a value, make sure it's correct.
5. Run the Troubleshooter
If you're experiencing the Ethernet not working issue, you can use the built-in troubleshooter in Windows to automatically diagnose and fix Ethernet problems. This troubleshooting method is only for Windows users, and will not work on MacOS. Here's how to run the troubleshooter:
- Click on the Windows Start button, type "Control Panel," and select it from the search results.
- In the Control Panel window, click on "Troubleshooting" located on the bottom-left side of the window.
- In the Troubleshooting window, click on "Network and Internet" located in the middle of the window.
- In the Network and Internet window, click on "Network Adapter" located at the bottom of the window.
- The troubleshooter will scan your computer for problems and suggest solutions. Follow the prompts to diagnose and fix the issue.
6. Reset Network Settings
If you've tried other solutions and are still facing the Ethernet not working issue, the network reset settings might help. Here's how to do one:
On Windows:
- Go to Command Prompt: Click on the Windows Start button, type "cmd," and select "Command Prompt" from the search results.
- Type "netsh winsock reset" and hit Enter: In the Command Prompt window, type "netsh winsock reset" and hit Enter on your keyboard. This command resets the Winsock catalog to its default settings.
- Restart your computer to apply the changes. After the command has been completed, restart your computer to apply the changes.
On Mac:
- Click the Launchpad icon in the Dock.
- Type "Terminal" in the search field.
- Click "Terminal."
- Type "sudo ifconfig en0 down".
- Type "sudo ifconfig en0 up" (en0 is the name of the wireless interface).
7. Restart the Ethernet Adapter
Another possible solution for the Ethernet not working issue is to restart the router. This can help fix any temporary issues that may be preventing the Ethernet adapter from working properly. Just follow the steps below:
- Locate the power cord that connects the router to the electrical outlet and unplug it.
- Wait for at least 30 seconds to ensure that the router has completely shut down.
- Plug the power cord back into the electrical outlet to turn the router back on. Wait for the router to fully power up, which may take a minute or two.
- Once the router has fully powered up, check if the Ethernet connection is working properly. If the issue persists, try other solutions to fix the problem.
8. Change MAC Address
Sometimes, the MAC (Media Access Control) address of the Ethernet adapter can cause conflicts and result in an internet connection issue. To resolve this, you can change the MAC address. Here's how:
On Windows:
- Go to the Device Manager on your computer.
- Find and expand the Network Adapters option.
- Right-click on your Ethernet adapter and select Properties.
- Choose the Advanced tab from the Properties windows.
- From the options, select Network Address.
- Enter a new value for the MAC address or select the "Not Present" option.
- Click on OK to save the changes.
- Restart your computer to apply the changes.
On Mac:
- Open Terminal and type "openssl rand -hex 6 | sed ‘s/(..)/\1:/g; s/.$//’" to create a new MAC address.
- Disconnect from WiFi.
- Type "sudo/System/Library/PrivateFrameworks/Apple80211.framework/Resources/airport -z" and type in your boot password.
- Type "sudo ifconfig en0 ether xx:xx:xx:xx:xx:xx" (replace "xx:xx:xx:xx:xx:xx" with the new MAC address you created in step 1).
- Type "networksetup -detectnewhardware" and press Enter.
Note that some devices may not allow changing the MAC address. If this is the case, try other solutions to fix the issue.
9. Flushing the DNS
Flushing the DNS (Domain Name System) can help clear out and remove any corrupted or outdated DNS information that may be causing network connections issue, like Ethernet not working. To flush the DNS, follow these steps:
On Windows:
- Go to Command Prompt.
- Type "ipconfig /flushdns" and hit Enter.
- Wait for the process to complete, which usually takes a few seconds.
- Restart your computer to apply the changes.
On Mac:
- Go to the utility folder by clicking on Go > Utilities > Terminal, or opening the Applications folder and double-clicking on Utilities, then Terminal.
- In the Terminal window, type "sudo dscacheutil -flushcache; sudo killall -HUP mDNSResponder" and hit Enter.
- Enter your Mac's password when prompted and press Enter to clear the DNS cache.
10. Check the Status of IP Configuration and DHCP Service
DHCP (Dynamic Host Configuration Protocol) automates the process of assigning IP addresses and other configuration details such as subnet masks and default gateways. To configure your IP settings manually, follow these steps:
On Windows:
- Open the Windows Search Bar and select the "Settings" app.
- Choose the "Network & Internet" option and click the "Status" bar.
- Select the "Properties" option.
- Scroll down and click on the Edit button under the IP settings.
- Configure the IPv4 settings manually by selecting the Manual option and turning the IPv4 option On.
- Specify the following details:
- IP address
- Subnet prefix length
- Gateway boxes
- Enter the addresses of the primary and secondary DNS servers in the Preferred DNS and Alternate DNS boxes.
- Specify the IPv6 settings using the aforementioned steps.
- For Automatic DHCP, the settings are set automatically by the router.
- Restart your PC to apply the changes.
On Mac:
- Open System Preferences.
- Click on Network.
- Check if Using DHCP is selected next to Configure IPv4.
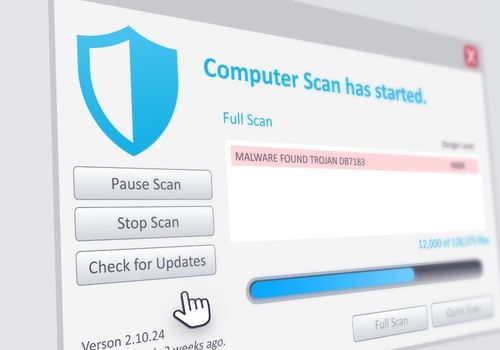
11. Scan for Viruses
Ethernet connectivity issues can be caused by viruses or malware infections that can disrupt network status or interfere with router settings. To prevent network disruptions, it is essential to have a reliable antivirus program installed on the system.
Windows Defender is a useful tool to scan for harmful viruses and it can run a quick or full scan. Follow these steps to scan for viruses using Windows Defender:
- Open the Windows Search Bar.
- Search for "Windows Security.
- On the left tab, click on the "Virus & threat protection" option.
- Click on "Scan options" to select from the available scanning options.
- Choose from the four scanning options available.
- The "Full scan" option is an in-depth scan that can detect possible threats.
- Click on the "Scan now" option to start the scanning process.
- The scanning process may take a while to scan all the files.
- Restart your PC once the scanning process is complete.
12. Update and Reinstallation of Operating System
If the previously mentioned solutions don't work, you may need to update your Windows files or reinstall the operating system. To do this, follow the steps below:
For updating Windows files:
- Open the Windows Search box.
- Search for "Windows Update Settings." This will open a window with information related to updates.
- Click on "Check for updates."
- Install any available updates.
Reinstall the System
If updating the Windows files doesn't solve the issue, you may need to consider reinstalling the system. Here's how:
On Windows:
- Download the Windows installation file from the official Microsoft website.
- Click on "Download Tool Now" to download the file and then install it.
On Mac:
- For Macs with Apple silicon, shut down your computer by choosing the Apple menu > Shut Down. Then, hold down the power button until you see "Loading startup options." Choose Options, click Continue, and follow the onscreen instructions.
- For Intel-based Macs, choose Apple menu > Restart, then immediately press and hold one of the following key combinations based on what you want to do:
- Install the latest compatible macOS version: Option-Command-R.
- Reinstall your computer's original macOS version, including updates: Option-Shift-Command-R.
- Reinstall your current macOS version: Command-R.
- Once the Recovery app window appears, select the Reinstall option for your macOS release, then click Continue.
- Follow the onscreen instructions and select your current macOS volume when prompted to select a volume. In most cases, it will be the only one available.
Read more resources
Final Thoughts
The Ethernet cable issue can be frustrating and can cause disruption to your work or online activities. A few things can cause this issue, ranging from simple configuration problems to more complex network issues or even virus infections.
The good news is that there are several solutions you can try. These include basic troubleshooting steps like resetting your network settings or restarting your router to more advanced options. For example, updating your network drivers or even reinstalling Windows.