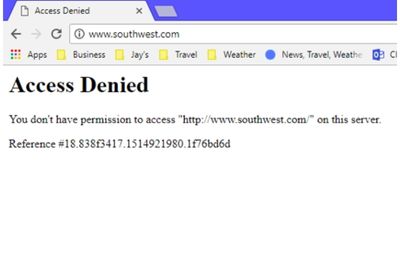
If you keep getting the Access denied on this server error, you may have set different proxy settings than what's on your PC. Fixing this is easy. Temporarily disable your VPN extension, or reset your browser data.
I recently downloaded a VPN extension and kept seeing the full error message saying "access denied server". At first, the issue only popped up when I opened YouTube, but it started appearing more often.
Let's look at how you can fix this issue below.
How to Fix "Access Denied On This Server" Error Message?
There are many fixes to try, and they include:
Solution 1: Delete Site Data
The issue may not appear due to a software problem. Instead, the site you're visiting may just be glitching out.
Most of the time, the error only pops up on Firefox and Chrome. Luckily, they come with special features that allow you to forget site data. If you are in fact dealing with a site glitch, this should help.
Here's what you do on Mozilla:
- Launch Firefox
- Press Ctrl + H shortcuts to open your browser history tab
- Find the website that causes the access on this server denied error
- Select it
- Select the 'Forget About This Site' option from the drop down menu that appears
- Refresh the website
Here's what you do on Google Chrome:
- Launch Google Chrome
- Click on the More icon (the three dots arranged vertically)
- Click on the Settings window
- Tap the Privacy and Security menu on the left
- Click on Site settings
- Choose Cookies and Site Data, then select the See All Cookies and Site Data option
- You will see a list of all of your cookies
- Look for the problematic website causing the access denied error
- Click on the Delete cookie button once you've found it
- Restart your browser afterwards
- Go to the specific website that is acting up
Hopefully the error will be gone now. If not, I have a couple more fixes to try.
Solution 2: Disable VPN Extensions
If you have a free VPN extension running, its poor encryption could be responsible. Temporarily disable it and see whether this helps.
The process to disable VPN extensions will differ depending on your browser. I've touched on what to do below.
Google Chrome
- Launch Google Chrome
- Click on the More icon (the three dots arranged vertically)
- Choose the More Tools option
- Click on Extensions
- Alternatively you can type Chrome://Extensions into the search bar
- Scroll down and click on the extension box on the bottom right corner of the screen
- Toggle it off
You can entirely uninstall the extension. Here is how:
- Find the VPN extension from the Extensions window
- Click on it
- Tap the Remove button
Mozilla Firefox
- Launch Mozilla Firefox browser
- Click on the Menu button
- Select Add-ons and Themes button from the menu that appears
- Switch to the Extensions tab
- Look for your VPN extension from the list
- Use the toggle button to temporarily disable it
To uninstall the extension:
- Click the More actions button
- Find the extension in question
- Tap Remove from the context menu that appears
Microsoft Edge
- Enter the following into the address bar - edge://extensions/
- Find the VPN extension that you want to turn off
- Toggle it off
To uninstall VPN extensions:
- Find the VPN software you want to get rid of
- Click on the Remove link underneath the extension's name and information
Opera Browser
- Launch Opera browser
- Click on the main context menu on the top-left corner
- Head to the Extensions page
- Find your extension
- Toggle it off or click the X button on the top-right corner
Solution 3: Disable VPN Software
Just like with the extension, having a subpar standalone VPN running can be the culprit. When it comes to disabling it, there isn't much work involved. Simply find the virtual private network from your home screen, launch it, then click on Disconnect from the main-page.
Solution 4: Use a VPN Software
On the flip side, if you are not using a VPN, this might actually fix the issue. This problem could be caused by the location of the IP that you connect from. So, if you are on a VPN, disconnecting from it can solve the issue. If you are not using a VPN, connecting to one might solve the issue.
In terms of free VPN services, Proton is an excellent choice. However, if you are looking for complete functionality and are willing to pay for one, NordVPN is a great option.
Solution 5: Disable Proxy Server
Having a proxy server enabled could be responsible. This hides your IP address similar to a virtual private network, so if it doesn't do a good job at this, the access denied error message can appear.
Go ahead and temporarily disable the proxy server and see whether this helps.
Here's what you do on Windows 10:
- Go to your computer's taskbar
- Open the search bar by clicking on the magnifying glass icon (or press Windows + S)
- Type in Internet Options into the pop up window
- Click on the first search result
- Go to the Connections tab once you see the windows menu appear
- Click on the LAN settings button from the Connections tab
- Deselect the Use System Proxy Settings option
Your network traffic won't be filtered by a proxy, so this should have helped.
Solution 6: Clear Browser Data
Before moving onto my last solution, I advise you to clear your browser data. If you're dealing with a stubborn glitch, this should help.
In case you're wondering, you won't lose any custom settings.
Of course, the process to clear browser data will differ depending on your browser.
Google Chrome
- Launch Google Chrome
- Click on the More icon (the three dots arranged vertically)
- Go to the More Tools section
- Click on Clear Browsing data
- Set the Time Range to All Time
- Tick the Browsing History, Cookies, Other Site Data, Cached Images, and Files option
- Tap the Clear Browsing Data button
- Restart Google chrome
Firefox Browser
- Launch Mozilla browser
- Click on the menu on the upper-right corner of the screen
- Open the Options setting or type About:Preferences into the address bar and press enter
- Go to the Privacy and Security tab
- Scroll down until you find the browser cookies and data section
- Tap the Clear data option
- Select Cookies and Site Data (you can also clear cache)
- Tap the Clear button
- Visit the specific website that's giving you trouble
Microsoft Edge
- Launch Microsoft Edge
- Click on the Menu button on the top-right corner
- Select Settings
- Type the following into the address bar - Edge://Settings and press the Enter
- Head over to the Cookies and Site permissions tab
- Click on Manage and Delete Cookies Site Data on the top of the page
- Tap the See All Cookies and Site Data button
- Wait until you're redirected to a new page
- Choose the Remove All button (you should see a pop-up message appear on the screen)
- Read the warning message
- Select the Clear button
- Check whether the Access Denied error is still popping up
Solution 7: Reset the Browser
Last but not least, you can try resetting your browser. Just know that all the custom settings that you've set would be cleared. This might be the only fix that will help.
Once again, the process to follow will differ depending on the browser that you are using.
Google Chrome
- Launch Google Chrome
- Click on the More icon (the three dots arranged vertically)
- Choose the Settings option
- Scroll down until you get to the bottom of the page
- Expand the Advanced Settings menu
- Scroll down to the bottom
- Click on Restore Settings to their original Defaults from the control panel
- Read the warning that appears (you will lose all the custom connection settings and settings that you've set)
- Agree to the warning message and then wait for your default configurations to reset
Mozilla Firefox
- Launch Firefox browser
- Click on the menu icon on the upper-right corner of the screen
- Select Help
- Click on the More Troubleshoot Information option, or type About:Support into the address bar, then hit Enter to be redirected
- Click on the Refresh Firefox button that appears
- Read the warning message, then select Refresh Firefox to confirm the change
- Wait for all your default configurations to appear
Microsoft Edge
- Launch Microsoft Edge browser
- Click on the three dots on the top-right corner of the screen
- Select Settings from the options on the screen
- Go to the Reset Settings button
- Tap the Restore Settings to their Default configuration button
- You will see a pop up warning with a message notifying you that all your custom configurations are gone
- Confirm the change
- Wait for Edge to reset (this might take a minute or two)
FAQ
Answered below are some popular questions.
Why Am I Getting Access Denied on This Server Chrome?
Usually, you will come across the permission to access error when you're dealing with a network-related issue.
Read more resources
Final Thoughts
The Access denied error usually pops up when your browser is not using the same network settings as your computer.
There are many things that can cause the Access denied on this server error message. It usually comes up when you're using a subpar VPN software. Temporarily disabling it, or opting for a more premium VPN service might be the way to go. In my opinion, NordVPN is an excellent paid VPN service.
Other than that, clearing browser data, changing your Local Area Network settings, and disabling proxy servers can the trick. Out of these, going to the reset settings tab to clear browser data is the easiest.
As mentioned, I've dealt with the access denied error before. I've not only discussed how to take care of it but some additional information like system proxy settings as well.
I hope you found this guide useful.