Please note that prices on this website are subject to variations, therefore some prices could be over the price limit mentioned in the post.
In this review, you can find out which hardware is most useful for building the best gaming PC under 500 dollars.
People think of PC gaming as a very expensive hobby but that's not entirely the case. Of course, if you want to be able to load up the latest games at ultra-high resolutions, you'll need to buy some pricey PC hardware. However, if you’re willing to sacrifice on resolution or you’re just happy playing less-advanced games, then all you need is a budget build.
Even popular e-sports titles like League of Legends and CS: GO don’t require much in terms of specs. So technically, you could get into competitive gaming without burning a hole in your wallet.
Contents
My component choices weren’t based on price alone. I made sure to only pick items that were reliable and capable of delivering great performance. In this section, I’m going to review each choice so you can understand why I’m recommending them.
The Specs:
There's a lot to love about the Ryzen 5 2600. First of all, it's got 6 cores and 12 threads. Cores are the actual processing components inside the CPU. The greater the number of cores, the more tasks the CPU can handle simultaneously.
Having 6 cores means that you have plenty of processing power to run games and other heavy applications like video-editing software.
But what are threads? Modern CPUs like the Ryzen 5 2600 use a technology called hyper threading to split each core into two virtual cores known as 'threads'. Hence this further increases the number of tasks that the processor can handle at any given time. Intel processors at this same price point don't usually have hyper-threading which is one of the main reasons I chose to go with AMD.
The Ryzen 5 2600 features AMD SenseMI technology which automatically boosts the processor's clock speed. This means that you don't have to manually overclock the processor to get it to work at maximum speed. This processor has a boost clock speed of 3.9 GHz which is plenty even for some of the latest Triple-A titles like Doom Eternal, although you'll have to dial back the resolution.
The Ryzen 5 2600 comes bundled with AMD's own Wraith Stealth Cooler which means that you don't have to spend time hunting for a low-cost aftermarket one. However, if you plan on gaming for hours on end, you may want to invest in an even better cooling system.
Pros
Cons
The Specs:
As its name suggests, this motherboard is focused on gaming, offering features that can give you an edge with competitive games. For example, the MSI Gaming Plus has a proprietary gaming port to which you can connect any high-end gaming peripheral and then tweak its settings on the fly. You also get software called "Mouse Master' that allows you to mess with settings like the polling rate and DPI and set up hotkeys for commonly used actions.
In addition, this motherboard is bundled with other MSI gaming tools like the MSI App player, voice boost, and the one-second overclocking feature which should pair nicely with the Ryzen’s SenseMI.
The Gaming Plus is fitted with features like steel-reinforced PCIe slots, which is where you mount your graphics card. These stool slots are extremely sturdy and will prevent your card from sagging over time.
The cooling system on this motherboard is quite excellent, with 6 fans that you can control via the BIOS. The included 'Hysteresis' software constantly monitors the temperature and tweaks fan speeds in real-time.
The MSI Gaming Plus comes with a lot of component slots including 4 DIMM slots supporting up to 64GB of RAM, two PCIe x16 slots (so you can have one more graphics card and one M.2 Slot and 6 SATA slots for storage.
Pros
Cons
Specs
The MSI R7 240 has got 2GB of GDDR3 of V-RAM, which means that it’s best suited for mid-tier games. If you’ve got a little extra cash to spend and you want a 4GB graphics card, I suggest you look into the XFX RX 570.
The R7 240 is compatible with the MSI Afterburner, which is an easy-to-use interface for overclocking it. With the Afterburner, you can tweak the GPU’s clock frequency as well as the voltage. In addition, you can keep fan speeds at an optimal level so that card doesn’t get too hot and the fans don’t get too noisy.
With regards to size, the R7 240 is pretty low-profile, requiring only a PCIe x8 socket (with x16 being the largest size). Hence it won’t block other components in your motherboard.
Pros
Cons
The Specs:
First of all, the Vengeance LPX has a small form factor which meant that I didn't have any trouble fitting this in with the other components on the B450M motherboard.
This RAM module comes with XMP 2.0 software. Without getting into too much detail, it's essentially a technology that will automatically set the RAM module to the safest 'fast speed'. This will ensure that the module doesn't overheat and start stuttering. In addition to this, the Vengeance LPX is fitted with an Aluminium heat spreader which has a high rate of heat dissipation. This way the generated heat is quickly pulled away from the internal components.
The Corsair Vengeance LPX contains an 8-layer PCB. Typically, the more PCB (Printed Circuit Board) Layers a RAM has, the better quality it is. PCBs are the green boards that the memory chips sit on. Each layer inside a PCB has traces and circuits which allow data to move back and forth. The greater the number of layers, the more space there is between the traces. This, in turn, results in less signal interference as the data is transported.
All in all, the Corsair Vengeance LPX 8GB is a very reliable RAM module and it can certainly keep up with video games and other heavy applications.
Pros
Cons
The Specs:
The SU635 from ADATA is one of the best solid-state drives I've come across for PC builds under 500 dollars. This is pretty fast. It's able to reach up to 520 MB/s in read speed and 450 MB/s in write speed. This means that games and other data-intensive software can load up very quickly.
When reading or writing data, the SU635 uses a protocol called Single Level Cell (SLC) caching. Without bogging you down with technical details, SLC caching involves storing one bit of data per cell inside the memory chip. This allows the SSD to write data at high speeds while consuming a low amount of power.
The ADATA SU635 comes with Low-Density Parity-Check which is a technology that corrects errors in code. It checks the code in your data, identifies any anomalies, and proceeds to rectify them. This ensures that your data doesn't get corrupted.
Lastly, the SU635 is bundled with ADATA's own SSD Toolbox and Migration Utility tool. This software helps you keep an eye on the drive's health and also makes the switch from HDD to SDD much easier. It lets you make a secure backup of your data including your operating system and migrate it to the SSD.
Pros
Cons
The Specs
The Cougar MX330 is a great fit for gamers. First of all, it's got 7 PCI slots which means that you can fit in your essential components and then some. It supports graphic cards that are up to 350mm in length which means that I could even mount an extra-large one in there like my NVIDIA Geforce RTX 2080. Hence it's got plenty of space for the MSI AMD Radeon R7240.
Once you've got everything set up inside the MX330, it's easy to just reach in and change things around thanks to the transparent glass window on the side. This also means that you can show off all your nice gear and your cable management skills.
The MX330 supports up to five fans plus a radiator allowing you to upgrade for better thermals in the future. For now, the combination of the AMD Wraith Stealth Cooler and the ventilation from the MX330's front face wire mesh should be adequate for casual gaming.
This case features a decent I/O as well with four USB ports (2 USB 3.0 and 2 USB 2.0) along with one Mic and one Audio jack. If you have a ton of gaming peripherals you want to connect I'd suggest you get a decent USB hub. However, that'll push the total bill beyond $500.
Pros
Cons
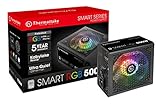
The Specs:
The Thermaltake Smart 500W is quite an impressive power supply unit. For starters, it feels very sturdy in your hand, like an industry-grade product. This PSU is 80% efficient with typical usage, which I think is quite decent.
The smart 500W comes with a 120mm fan already setup which continuously keeps it cool. Also, the fan is extremely quiet and I don't think I've ever noticed it working. In addition, this PSU has a few protective features built-in: Over Power Protection (OPP) Over Voltage Protection (OVP) and Short Circuit Protection (SCP). These prevent damage to internal components in the case of sudden surges or shortages.
Pros
Cons
While it’s definitely more convenient to buy a prebuilt PC as opposed to building one yourself. The truth is that you’re not going to get the best components for a price. This is because you also end up paying for assembly and the brand.
First of all, let’s take a look at the different types of components you’ll need to build a fully functional PC. In the next section, I’m going to be reviewing my hardware picks so you can see why I chose them.
The CPU or the processor is the brains of your computer. Its function is to simply take commands from the programs you run and execute them. This might involve anything from loading up a desktop application or web browser to playing a video.
When it comes to CPUs, the brands Intel and AMD pretty much dominate the market. For our build, we’re going to be using an AMD processor: the Ryzen 5 2600.

The motherboard is essentially a large circuit board that holds and allows communication between all the essential hardware components. It’s got slots for your processor, graphics card, memory modules, and a whole host of other components.
When you’re building a PC, you can’t just get any motherboard. You have to make sure that it supports the processor you have. This can be easily determined by looking at its socket and chipset and then cross-checking that with the processor’s requirements. You can find this information by going to the manufacturer’s website and going through the product specifications.
So since we’re going with the Ryzen 5 2600, we need a motherboard that has a B450 chipset and an AM4 socket. My choice would be the MSI Gaming Plus B450M.
RAM stands for ‘Random Access Memory’ and it refers to your computer’s temporary storage. It stores the information that your PC needs right now and in the near future. This includes what tabs you’ve currently got open in your web browser, the settings you’ve specified in your game…etc.
The advantage of having this information stored in your RAM instead of your hard drive is that it makes data retrieval much faster. Hence, games and other applications can load and update faster.
For our build, we’re going with the Corsair Vengeance LPX 8GB DDR4 RAM module. Keep in mind that if you want to play the latest games at high resolutions, then you’ll most likely need 16GB of RAM. However, we’re going to keep it at 8GB so we don’t go over our $500 budget.
When it comes to permanent storage, you have two options: a hard disk drive (HDD) or a solid-state drive (SSD). The former is cheaper while the latter is faster.
For our build, we’re going to go with an SSD. This is because game files are typically very big so we don’t want to waste a ton of time when it comes to downloading and installing them. The downside is that we’re not going to get less storage than if we were going for an HDD in the same price range.
To keep the build below $500, I choose the ADATA SU635 240GB. It should be plenty to start us off with.
The graphics card (or more accurately the Graphics Processing Unit inside the card) is what allows your PC to render 2D and 3D graphics. The more powerful your graphics card, the more detailed the textures and three-dimensional objects in your video game are going to look.
When it comes to graphics card manufacturers, the two most popular options are NVIDIA and AMD. For this 500$ gaming PC, I’m going to go with an AMD graphics card: the MSI AMD Radeon R7240.
The case is what’s going to hold all of our components together. Case sizes correspond with the different motherboard form factors: ATX, mini-ITX, and micro-ATX. Fortunately for us, the MSI Gaming Plus comes in all three sizes so we’re not limited to one particular case size.
On the other hand, you also get cases that support all sizes of motherboard like the Cougar MX330 which I chose for this build.
The power supply is what’s going to keep all our components powered. When you’re buying a power supply you need to make sure that it’s not too large for your case. Since I’ve already chosen a large case, this wasn’t a problem. Hence, I chose the Thermaltake Smart 500W.
These are all the quality components you need to build a top gaming computer under 500 dollars.